
Project Summary
Over the past few weeks, I’ve been focused on compiling an improved Game Template — one that incorporates many of the major features you’ll find within a ‘standard’ game. I included a very basic template within the Introductory Defold Tutorial, however, it was extremely limited. At this point, I’d like to include within a template many of the animation and GUI elements addressed within the introductory tutorials – as well as a few new features to serve as a starting point for future Defold Game Projects. This revised template includes stubs for each of the major game components you’d expect within a Mobile Game Application – to include: (a) Animated Designer and Game Logos, (b) Animated Graphic User Interface with a set of Level Buttons, (c) Separate Defold Collections for each game level, (d) an Information/Help Panel to provide game instructions, (e) a customized Rendering Script which enables the retrieval of window size specifications, and (f) the use of Lua Modules to support common functions which apply to all game levels.
I’ve also included some debugging text messages on the screen to assist in developing this application — they can be easily removed for a production version.
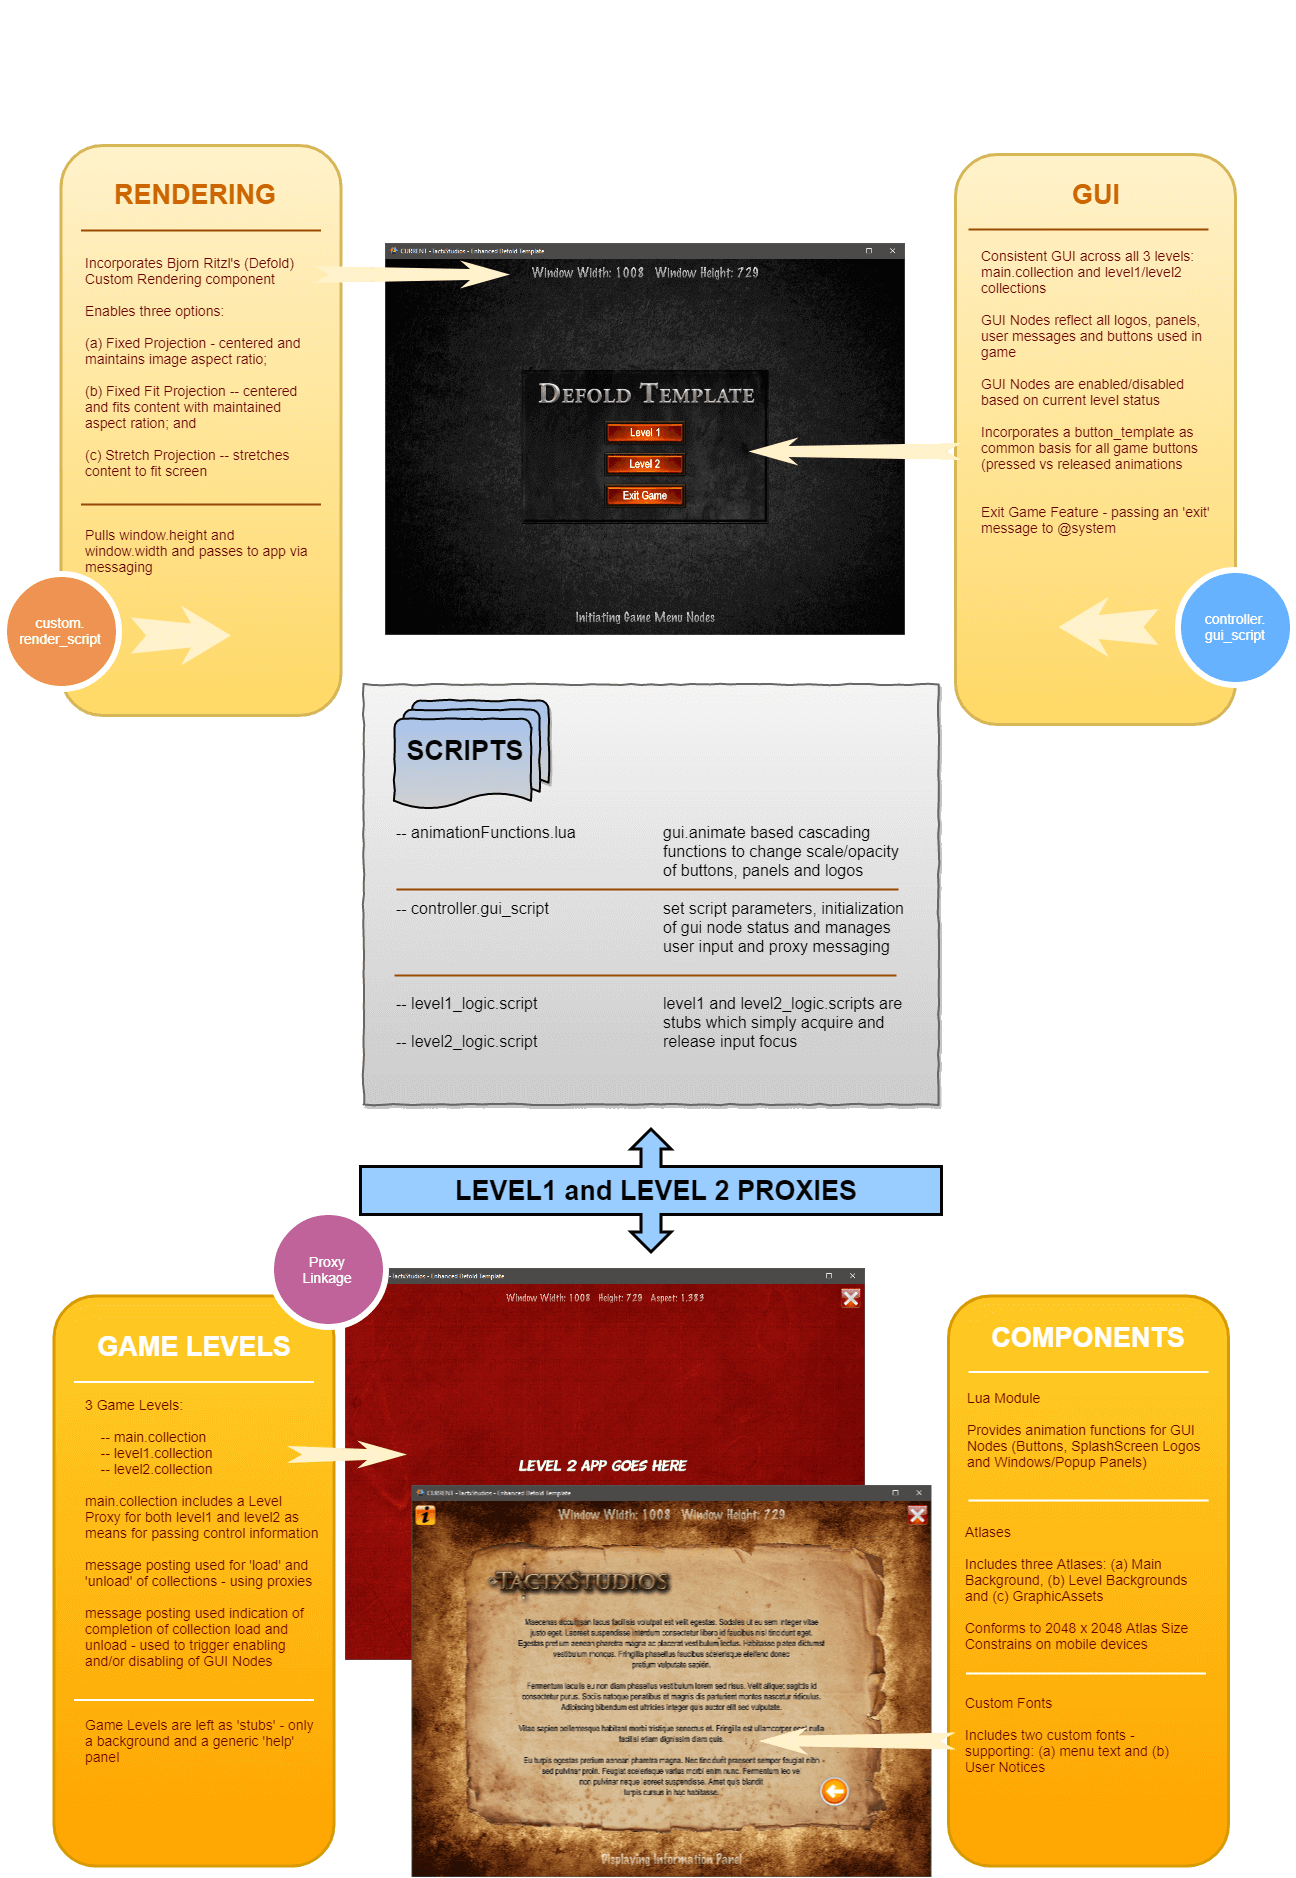
Here’s what the final Enhanced Defold Template will look like:

The following table summarizes the key features which have been integrated into this Enhanced Defold Game Template.
- CUSTOM RENDERING – I’ve included a custom lua script to support obtaining window size specifications. Additionally, a canvas resizing function has been added to the index.html file created during the Defold HTML5 Build process — to enable dynamic resizing of the game world when embedded within an iFrame.
- ANIMATED LOGOS — The template includes some basic GUI Animations when displaying both the logo for my (1 person) design studio as well for a unique logo for any specific game.
- GAME LEVEL MENU – Most games include multiple game levels, which a player can select from. The template includes both a background panel GUI node and animated buttons for each level.
- CROSS COLLECTION GUI – The template includes GUI elements that are persistent across all game levels, as well as GUI elements that are unique to a specific collection, e.g., an ‘Exit” button to return to the Main Menu.
- POPUP INFORMATION PANEL – I’ve included a button (top left) that supports the display of general gameplay information (e.g, Playing Instructions) when the player is within a specific game level.
- QUIT APPLICATION – This template also includes a menu entry that enables the user to quit/close the application – especially helpful for mobile games to either Android or iOS.
- RE-SKINNING – The ‘look & feel’ of a game can be easily customized or modified by swapping the images within the template.
- USE OF LUA MODULE FOR COMMON CODE – The template incorporates a common Lua Module supporting button, popup and GUI node animations
Project Design and Build Sequence
For this set of Game Tutorials, I’ve decided to include a brief graphic which summarizes the key design patterns which I’ve incorporated into the project. For this Enhanced Template – the pattern includes custom rendering, a game-wide GUI, and the use of Collection Proxies as the means for controlling loading and unloading of levels.
Since this template (and the other game tutorials within this section) assume you’ve already become acquainted with the Defold features described within the Introductory Tutorials — I’m going to abbreviate some of the descriptions of the mechanics related to how to add a collection, game object, script or GUI element to a Defold Project.
In summary – building this template will work through the following major steps:
I: INITIAL PROJECT SETUP
game.project Setup
Within the Defold game.project file, several parameters are changed for this project:
graphicAssets.atlas
The template uses multiple atlases to accommodate the full set of .png images within the example. The following images are used within this template – selected to enable future customization of the background, GUI Node images, Developer and Game Logos, etc. In essence, to create a new game using this template — the developer can substitute new images to replace any of the following — facilitating a quick ‘re-skinning’ of the application.
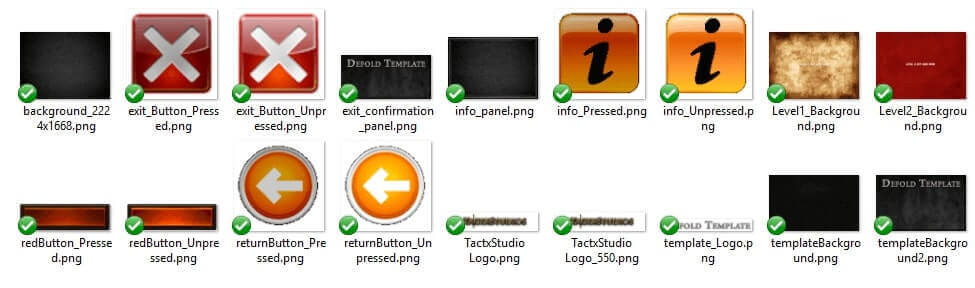
These images can be downloaded within a single zipfile by clicking the following button — placing them within the images folder within the Project Explorer.

Please note: Many mobile devices only allow you to use an Atlas which is 2048 x 2048 pixels in size. Therefore, to complete our graphics resources and to comply with these size limitations on Atlas files, you need to create three distinct Atlases:
The following table summarizes the content of each of the Atlases which are included in this project.
- background.atlas
- background_2224x1668
- levelBackgrounds.atlas
- Level1_Background
- Level2_Background
- graphicAssets.atlas
- Static Images: TactxStudioLogo, TactxStudioLogo_550, info_panel2, templateBackground2, template_Logo, and exit_confirmation_panel.
- Animation Groups:
- releasedButton – containing redButton_Unpressed
- pressedButton – containing redButton_Pressed
- releasedExit – containing exit_BackButtonReleased
- pressedExit – containing exit_BackButtonPressed
- releasedInfo – containing infoReleased
- pressedInfo – containing infoPressed
- releasedReturn – containing returnButton_Unpressed
- pressedReturn – containing returnButton_Pressed
Custom Font
I’ve decided to add a set of custom fonts to this project — as a means to tweak the user interface to match the tone & style desired for any specific game. Download this set of custom font files by clicking the following button and place them within a new folder (‘fonts’) within the Project Explorer.
Right-clicking the ‘fonts’ folder — select ‘New’ | select ‘Font’ | change the name to: ‘menuFont’.
Double-click ‘menuFont’ to have it within focus in the Outline Window and change the properties to reflect using ‘MenuFont_50_B-ipadhd.fnt’ as reflected below:
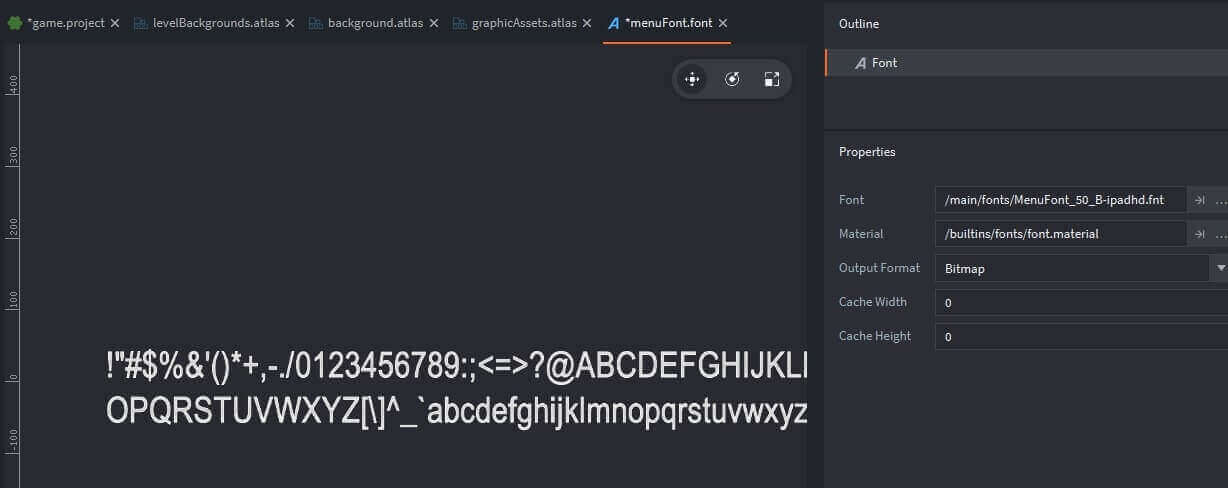
A new font (menuFont.fnt) will be added to this folder.
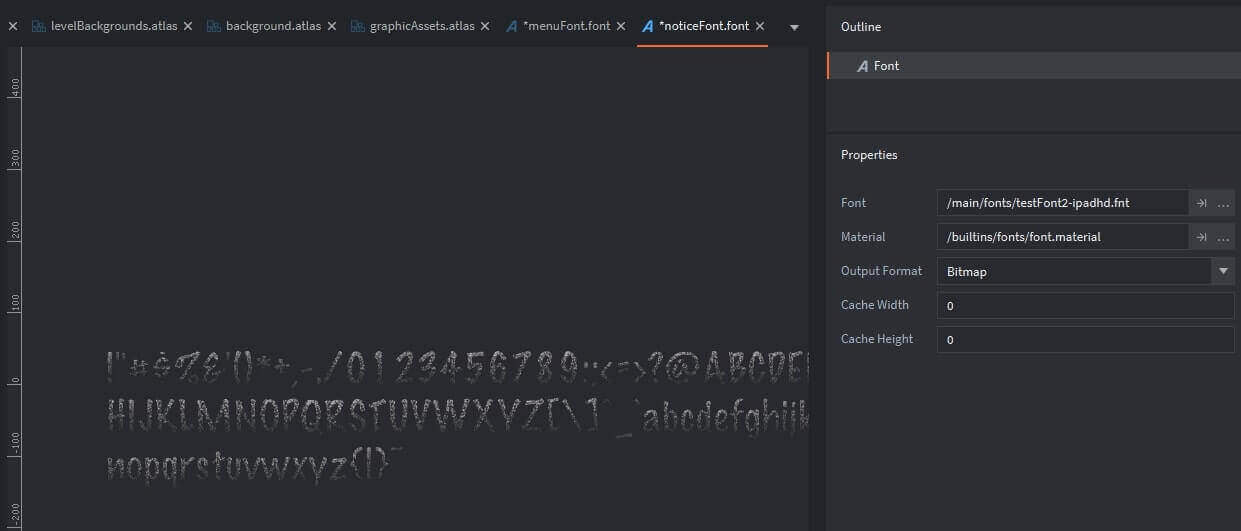
Similarly, we’ll create the second custom font by right-clicking the ‘fonts’ folder — select ‘New’ | select ‘Font’ | change the name to: ‘noticeFont’.
Double-click ‘menuFont’ to have it within focus in the Outline Window and change the properties to reflect using ‘testFont2-ipadhd.fnt’ as reflected below:
Custom Render Script
Bjorn Ritzl of the Defold team has created a custom render script which I’ve found to be very useful — it’s located on Britzl’s github site. This custom script enables you to select either (a) centering content with a maintained aspect ratio, (b) centered content and fitting the content to the screen with a maintained aspect ratio, or (c) stretching the content to fill the entire screen. For this template — I’ve selected the option to stretch the content to fit the screen — but you now have the flexibility (depending upon the type of game being developed) to switch between these options.
This custom rendering script can be downloaded by clicking the following button. Place the two files within a new folder (‘render’) within your Project Explorer.
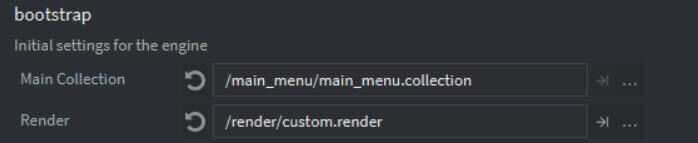
To complete the setup of this custom rendering, you need to reflect it in the game.project settings. Do this by changing the ‘Render’ parameter to: ‘render/custom.render’ as shown below:
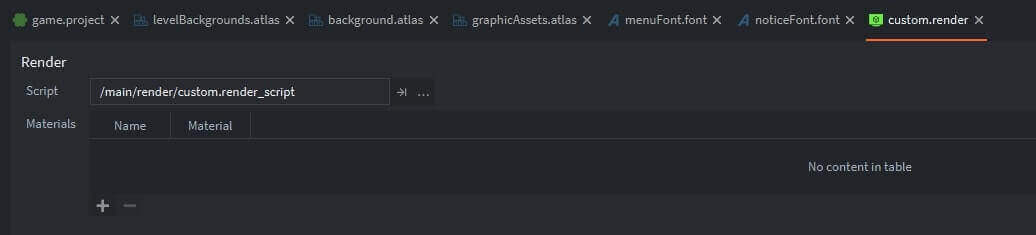
and then — double-click ‘custom.render’ in the Project Explorer to set the pointer to the new custom.render_script as shown below:
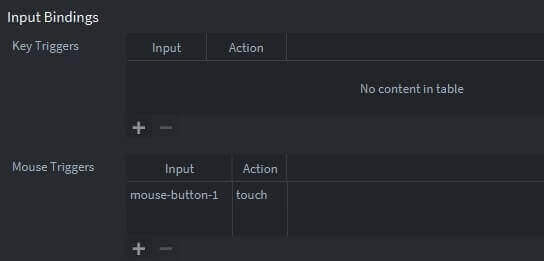
game.input_binding
The last step in the initial project setup is configuring the input bindings — we’ll keep it simple, only a ‘touch’ input associated with ‘mouse-button-1’, aka, the left mouse button (or touch on a mobile device).
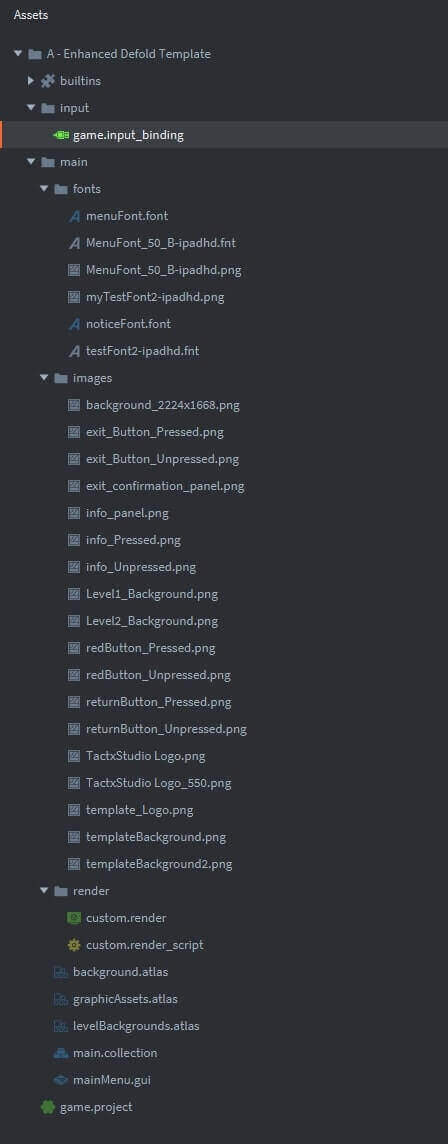
Project Explorer - End of Phase I
At this point (the end of Phase I), the Project Explorer should look similar to the following:
II: CREATE LEVEL1/LEVEL2 COLLECTIONS
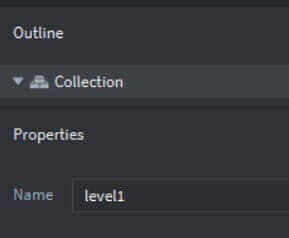
The next procedure in building this enhanced template is adding the collections for two levels (designated as ‘level1’ and ‘level2’). These are really just stubs for game levels you’ll be adding when you use this template for a real game project.
Create level1.collection
Within this collection add two Game Objects: (a) board, and (b) level1_logic.
Syntax Explanations
The level1_main.script is pretty straightforward — incorporating features described in the Introductory Defold Tutorials on this website. One topic to highlight is the message handling for “launchTest”. This is a stub to demonstrate the manner in which Defold messages can be passed between collections. The “launchTest” message will be sent from the main menu – which will be described in the next section.
Adding the Script to the level1.collection
I’ve added a new GameObject to the level1.collection — the Id is ‘game_level1’. I’ve added this script as a Component File to the ‘game_level1’ GameObject.
Create level2.collection
Adding the Script to the level2.collection
I’ve added a new GameObject to the level2.collection — the Id is ‘game_level2’. I’ve added this script as a Component File to the newly created ‘game_level2’ GameObject.
VII: END OF PART 1
We've completed the initial setup -- now proceed to Part 2 for creation of the Graphic User Interface components and final addition of the supporting scripts.
You can download the final project now if you want to get a headstart.
Go to Part 1
Go to Part 2