
Project Summary
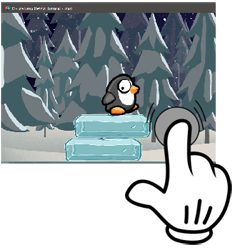
Everyone seems to get a kick out of playing the Stack (and Stack Jump) type of game….I thought that genre might serve as an interesting context for this next tutorial. This time, I’ve named the project IceJump! and the goal is to see how many ice blocks you can get a penguin to jump onto before it’s knocked off the stack. Additionally, to add some enhanced playability, the sequence of ice blocks comes from randomly selected sides of the game board, at randomly increased speeds as the ice stack grows higher. The use of a kinematic game object for the penguin is probably the key Defold feature being highlighted in this tutorial — this approach provides much greater control over game play than reliance on a standard physics model.
Introduction: GAME OVERVIEW
Following the trend set in our last tutorial — the mechanics of this game are relatively simple – but as the blocks move more quickly, the levels do get increasingly difficult. The game objective is pretty simple — a penguin stands on the ice as new ice blocks come from either side. The player can make the penguin jump up onto the next block by touching the screen — but the catch is that you can only jump once for each oncoming ice block. If you successfully land on top of the approaching ice block, you add 1 to your score and can prepare for the next ice block to appear. However, if you miss and get hit by the side of the ice block, the penguin falls down and the turn ends. At that point, the player has a chance to replay the game. As a simple feature, the high score is displayed as a benchmark goal on the right margin of the playing area.
For IceJump!, we’ll continue to use the techniques explained in the previous Defold tutorials, but additionally, I have incorporated a few new features. Specifically:
Here’s what the final CoinDrop Game looks like:
- SIMPLE DEFOLD GAME DESIGN – The game is based on a single collection (main.collection) and a single Graphic User Interface (mainMenu.gui) — keeping the overall game design very simple and straight-forward.
- KINEMATIC GAME OBJECT CREATION – To gain greater control over jumping, bouncing and stopping actions in response to other game objects, this project uses a kinematic collision object – which collides with the other ice block game objects, but the game scripts fully specify how to resolve those collisions, in lieu of the modified Box2D physics engine incorporated within Defold.
- RESOLVING OF KINEMATIC COLLISIONS – Resolves the multiple ‘contact_point_responses’ inherent in using kinematic collisions, implementing both bounce and jump effects integrated with sprite animation.
- ANIMATED SCOREBOARD – For this project, I’ve incorporated an animation where a star object is generated, fades into view and moves up the screen as the score is incremented for each successful ice block
- USE OF LUA MODULES FOR UTILITY CODE – A carry-forward from CoinDrop – this project incorporates two common Lua Modules: (a) animationFunctions, supporting button, popup and GUI node animations, and (b) fpsUtil – which captures frames-per-second and milliseconds between frames.
- DEFOLD DESIGN FEATURES USED FROM PREVIOUS TUTORIALS – The game includes many of the key features highlighted in the previous tutorials, to include: (a) animated splashscreen logos, (b) a custom render script, (c) custom fonts, (d) use of the native Defold timer extension and (e) onscreen debug messaging.
HIGH-LEVEL DESIGN DESCRIPTION
overview
Similar to the previous game tutorial, the IceJump! game is relatively straight-forward in design – based on a single collection, a single GUI and single Atlas – pretty simple! That said, the primary design alternatives I considered were focused on the appropriate physics model to apply to the game objects – both the ice block, but most especially, to the penguin.
As I mentioned previously, I’m trying to keep these game tutorials a little shorter – so I’m assuming you are already familiar with the following basic Defold project actions: (a) General Project Setup, to include, modifying the game project file, creating input bindings, adding images to a project and creating an Atlas, creating a collection and adding Game Objects to it, creating Game Object Prototypes and including a Game Object with a factory component and adding a script to a Game Object; (b) adding Custom Fonts to a project and (c) adding a custom render/custom render script to a project. Please refer to the Introductory Tutorials if you need a quick refresher on any of these actions.
The following illustration highlights the major assets used in this project.
Selection of the Collision Object Type
In previous tutorials, we have used either static or dynamic collision objects to support our game objects. Static objects never move (aka, a floor, or a wall) – and dynamic objects are simulated by the physics engine, applying gravity, friction and resolving all collisions automatically — however, you don’t have the ability to directly control the position or orientation of a dynamic game object, which is pretty important for some types of games. That leads us to another type of Defold Collision Object – the Kinematic Object. A Kinematic Object doesn’t use the physics engine. Rather, it allows the developer to include instructions within the scripts to change a game object position, velocity or acceleration, and it also registers all collisions with other objects, allowing the developer to control how to explicitly resolve such collisions using scripts.
For IceJump! – there are two primary game objects to consider:
Within the Defold Documentation is a detailed explanation of how kinematic collisions can be resolved. An additional resource which describes an approach is the Platformer Tutorial. Both examples highlight two major Defold Features:
Full Set of Game Project Files
For this tutorial, I’d recommend opening up the full project within the Defold Game Editor. I have included the full project within a zipfile which can be downloaded by pressing the following button. Go ahead and install it on your desktop and open it up with the Defold Editor.

The rest of this tutorial will walkthrough each element of the project and highlight the design criteria used to meet gameplay requirements.
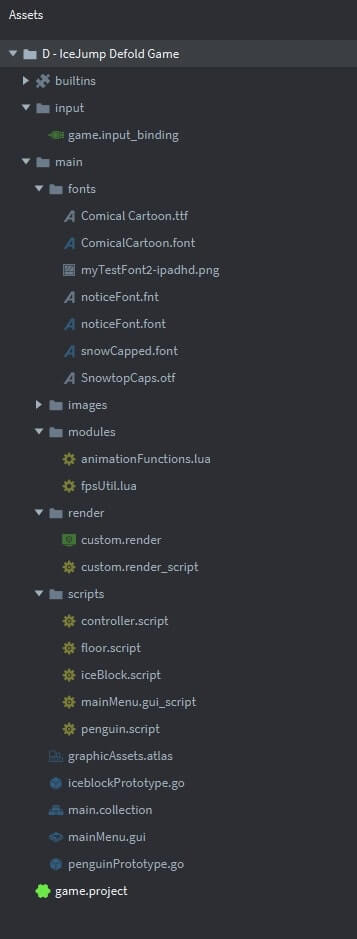
I: PROJECT SETUP PROCEDURES
Game.Project Setup
Within the Defold game.project file, you’ll notice that the following key parameters apply:
Project Atlases
This project uses a single atlas (graphicAssets.atlas) to accommodate the full set of .png images within the game. The images are contained within an ‘images’ subfolder under ‘main’ as you can see in the project explorer window. (You’ll also notice that I’ve placed some icon images within this ‘images’ subfolder as well)
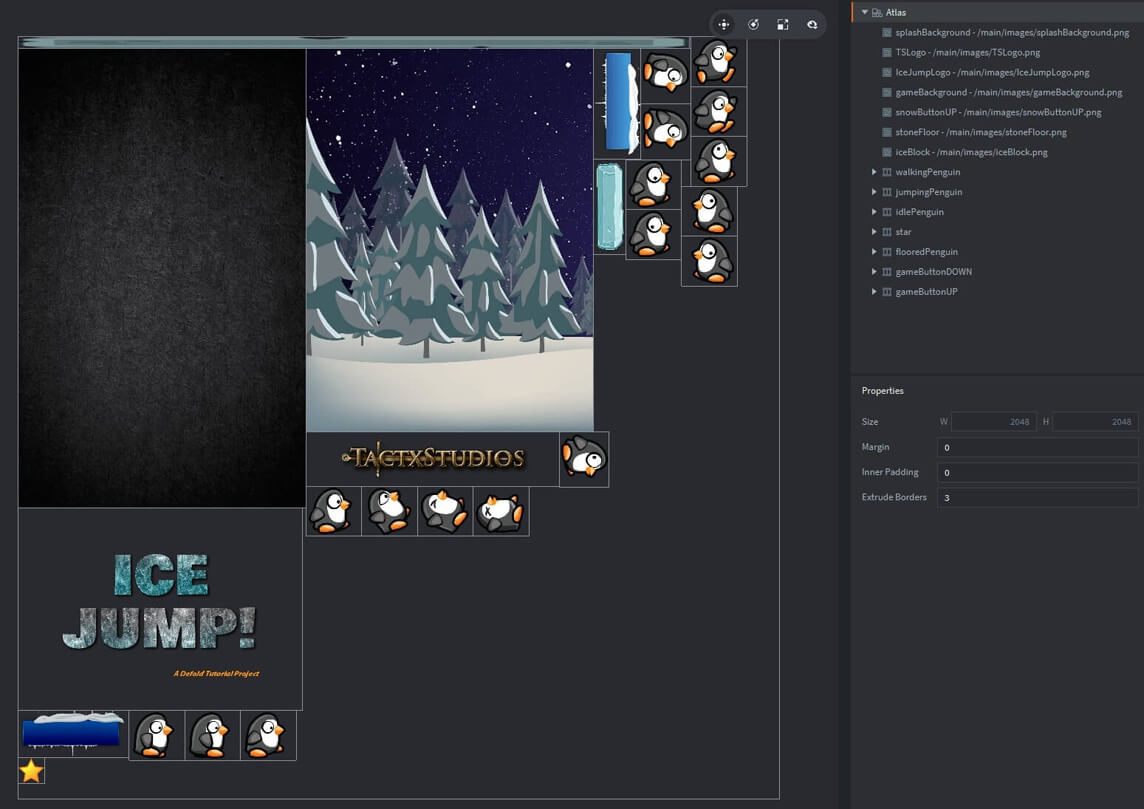
Attribution: These images are all free assets provided by the following sources: (a) splashBackground – publicdomainvectors.org, (b) gameBackground and star – kisspng.com, (c ) penguin – gameArtGuppy.com, (d ) ice block – moshimonsters.com, and (e) snow button – pngtree.com. The game logo was created using the free utility available at textures4photoshop.com.
Custom Fonts
I’ve used a set of custom fonts to this project — as a means to match the tone & style desired for the game. I’ve placed them within a ‘fonts’ subfolder and have created the ComicalCartoon.font and noticeFont.font files for this project.
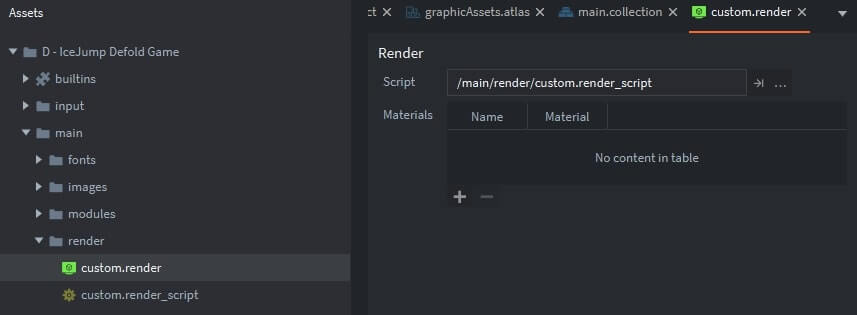
Custom Render Script
Bjorn Ritzl of the Defold team has created a custom render script which I’ve found to be very useful — it’s located on Britzl’s github site. This custom script enables you to select either (a) centering content with a maintained aspect ratio, (b) centered content and fitting the content to the screen with a maintained aspect ratio, or (c) stretching the content to fill the entire screen. For this project — I’ve selected the option to stretch the content to fit the screen — but you now have the flexibility (depending upon the type of game being developed) to switch between these options.
This custom rendering script is added as follows.
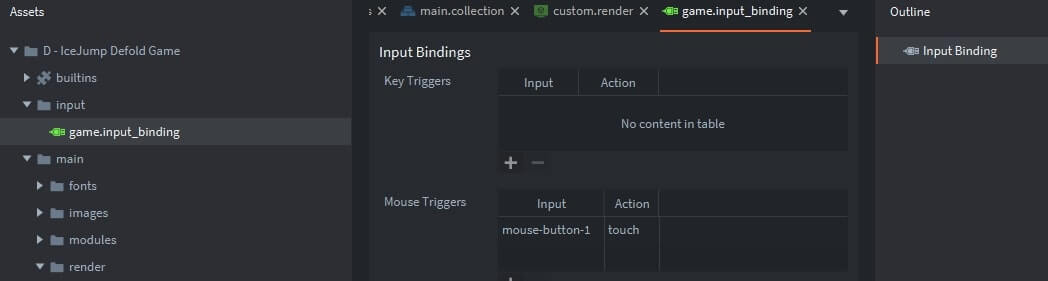
Game.Input_Binding
The last step in the initial project setup was configuring the input bindings — we’ll keep it simple, only a ‘touch’ input associated with ‘mouse-button-1’, aka, the left mouse button (or touch on a mobile device).
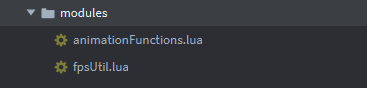
Lua Modules
The last initial setup step was creating a subfolder for the common Lua Routines which are used in this project. I’ve included animationFunctions.lua (which is a collection of gui animation routines which has been used in previous tutorials) and a new utility fpsUtil.lua (which provides Frames Per Second metrics).
I have extracted the fpsUtil routine from a robust set of Defold Metric routines prepared by Björn Ritzl, a developer on the Defold team. This full metrics extension is available on one of Bjorn’s GitHub pages.
II: MAIN.COLLECTION – HIGHLIGHTS
For this project, I created a new collection within the main folder – with the name: main.collection. The following image highlights the key components within this collection, in particular, (a) a background and collision objects which delineate the left, right, floor and ceiling of the playing area, (b) a controller Game Object (GO) to hold the controller script, and (c) game factories for dynamically generating the penguin and the ice block game objects, and a game object to contain the mainMenu GUI.
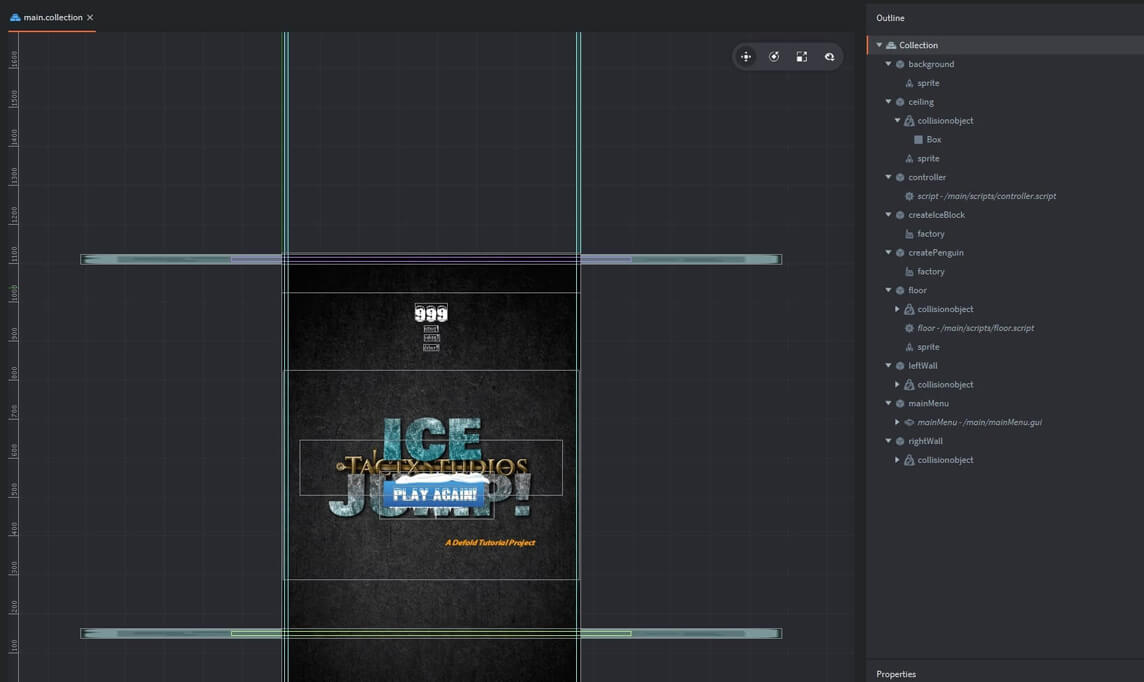
Special Interest Item within main.collection
I think you’ll find most of the structure of the main.collection to be pretty similar to what we have constructed in our previous game tutorials. That said – one unique aspect of this project is how to handle movement of the penguin game object (with its kinematic collision object). I’ve tried to summarize how this is accommodated within the following pseudo-code table. In summary – message processing parses the various types of collsions (aka, hitting the floor, the wall, the top of the ice block or one of its sides) and determines if there are impacts to the movement of the penguin. Such movement impacts are accommodated by setting up a bounce acceleration vector – which is than applied to the gravity acceleration vector during the frame update process. More details are shown below:
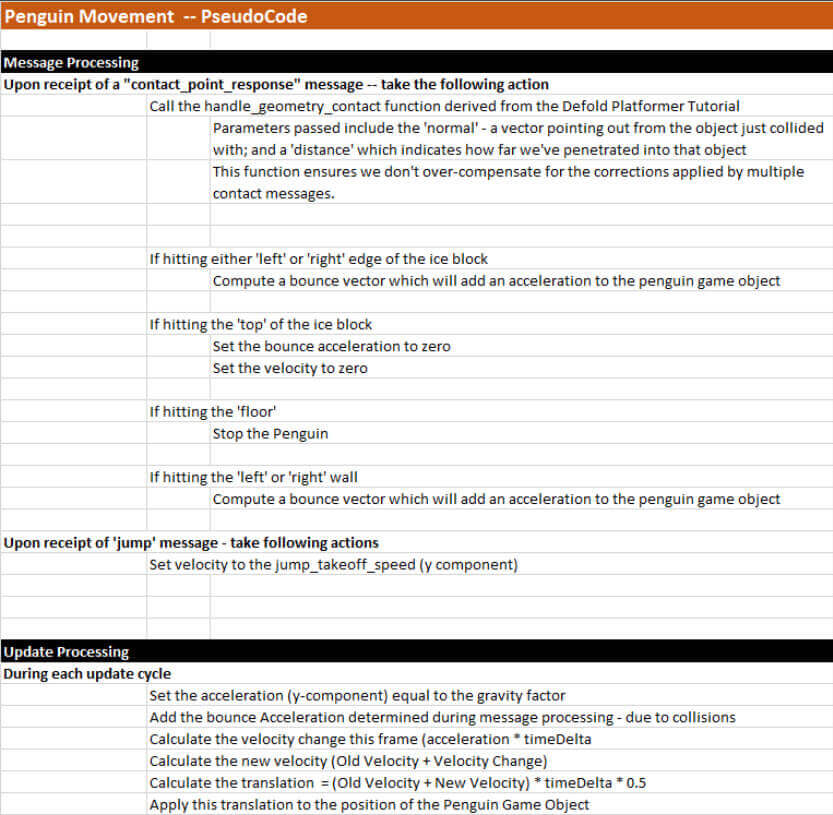
In summary, the script performs the following functions which impact movement of the penguin game object.:
When you review the source code within penguin.script – you’ll see how this logic is captured in Lua code for this project.
III: MAINMENU.GUI – HIGHLIGHTS
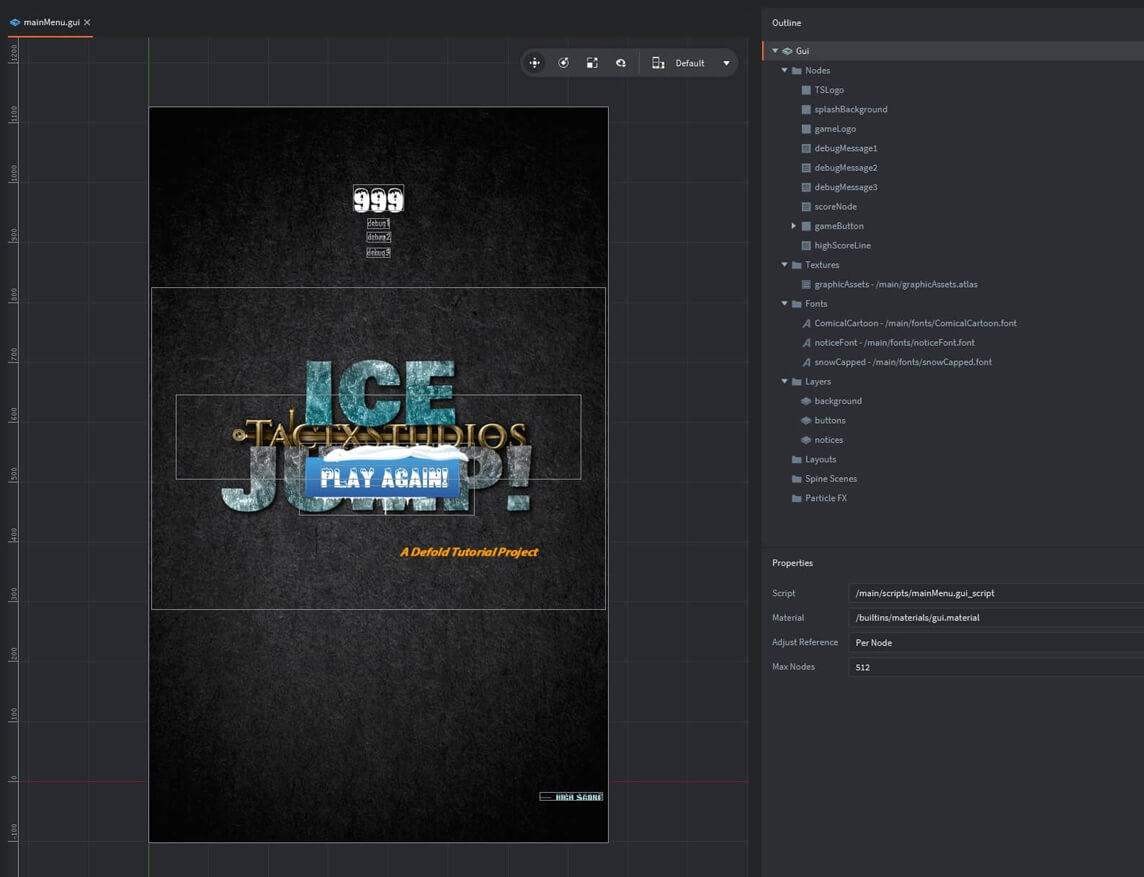
Go ahead and double-click the mainMenu.gui file within the Project Explorer — that’ll bring up the following outline for the GUI. As seen in the outline, the GUI consists of nine nodes, a reference to the atlas as the basis for texture, three fonts and three layers to control display characteristics. It also references the mainMenu.gui_script within the property window.
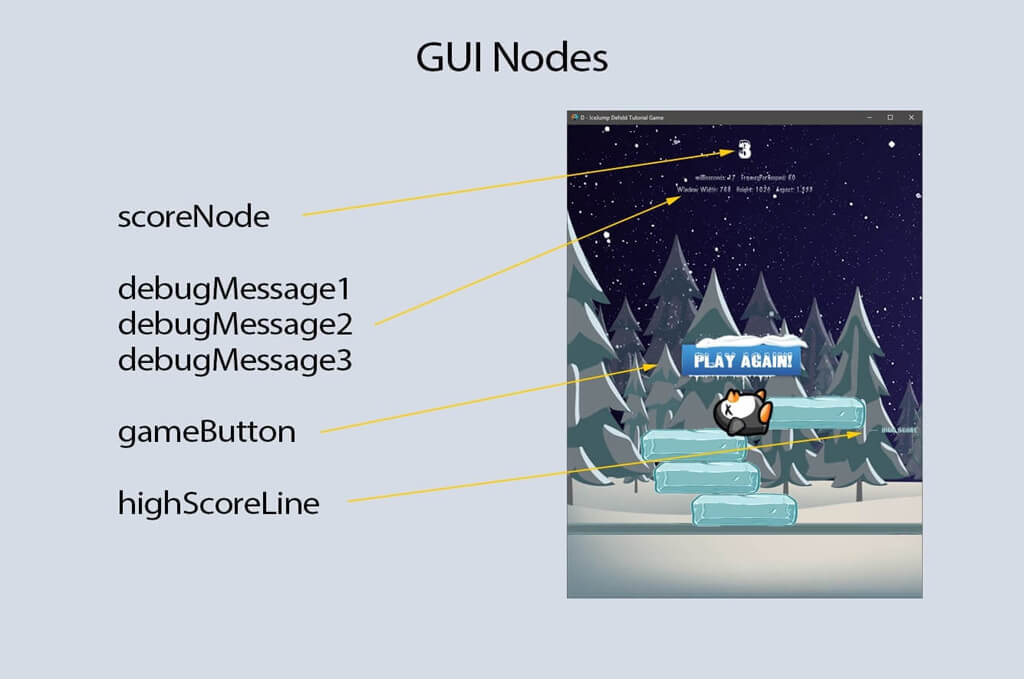
The splashBackground, TSLogo and gameLogo GUI nodes are displayed during the opening splash screen sequence. The following image illustrates the GUI nodes that are displayed during game play.
IV: script walkthroughs
The following script files are components of the CoinDrop! game — and control the actions related to all gameplay, to include:
I have included embedded comments throughout the source code to assist in easily walking through the logic.
Source Code for controller.script
- It declares several GLOBAL variables used for screen control (GAMESTATUS, CURRENTBLOCK, BLOCKACTIVE) and standard debugging variables (BYPASS_SPLASH, DEBUG_MESSAGE1/2/3).
- This script conducts initial game setup - spawning the initial ice block and the penguin character.
- This script provides functionality to messages: 'startNewGame', 'startNextBlock' and 'splashComplete'
I’ve included a copy of the commented source code below:
Source Code for penguin.script
- Processes msg_contact_point_response when penguin hits the edges of an iceblock, top of an iceblock or the floor
- Processs the 'jump' command
- Updates the penguins position
I’ve included a copy of the commented source code below:
Source Code for iceBlock.script
- Processes a 'stop' message
- Updates the ice block position
I’ve included a copy of the commented source code below:
Source Code for floor.script
- Gets the ID of the floor game object
I’ve included a copy of the commented source code below:
V: gui script walkthroughs
TFor this project, all graphic interface logic is included within a single gui script:
Source Code for mainMenu.gui_script
- Sets script properties for each gui node ID
- Processes the opening animations of developer/game logos
- Updates the animated Scoreboard
- This script provides functionality to messages 'startGame', 'addToScore', 'resetScore', and 'endGame'
- Processes input action on the jump game button
- Displays debug messages
The Lua Source Code is provided below — with the features and implementation techniques highlighted within the embedded comments.
VI: FINAL RESULT
I hope you’ve enjoyed this tutorial, and perhaps more importantly, that you’ve gain a little insight into the use of Kinematic Game Objects. At this point – the project is complete.
As shown previously, I have included the full project within a zipfile which can be downloaded by pressing the following button.
As always, if something doesn’t make sense — or if you have a question on how it works — please drop me a note in the comment box below. I’ll get right back to you. Let me know if you find these tutorials helpful.
All the best - Dave