
NEW - Video Version of this Tutorial Available on YouTube
I had published this set of introductory tutorials many months ago – but, since their release – I have received several requests to publish these topics as YouTube videos. Well, it has taken significantly longer than I had planned – but, they are now ready in video form. If you prefer to learn using a video platform, you might want to take a look at the following YouTube Entry.
Introduction for this Tutorial
Having recently completed an HTML-5 game using the Phaser.io game engine, I have been researching the numerous options for cross-platform developmental tools which would enable me to migrate away from a WebView hybrid solution and focus more on native application development. Although I was initially very excited about the potential of using a hybrid mobile app approach, the slow performance on mobile devices was definitely noticeable. As a result, after evaluating several alternatives (Defold, Gamemaker Studio 2, Unity, Corona, et al) –I have selected Defold as my game engine of choice — a 2D game engine from Midasplayer Technology AB, an affiliate of King.com Ltd.
I had taken a look at several competitive alternatives, but choose Defold because it is a turnkey solution which includes a Visual Editor, Lua Code Editor, Scene Editor, Version Control, Particle Editor and Tile Editor, enabling deployment across six target platforms (iOS, Android, HTML5, Mac OS X, Windows and Linux). Defold has recently released Version 2 of their editor.
I: KEY FEATURES
Defold is a turn-key solution, providing everything you need to build a game.
Animation
Flip book animations for sprites, GUI nodes and particles; Spine bone animations with full support for blending; Keyframe events; Inverse kinematics in keyframes and dynamically scriptable; All sprite and GUI properties can be animated; Predefined or custom easing functions for all property animations.
Cross-Platform
One click deployment to 6 target platforms (iOS, Android, HTML5, OS X, Windows, Linux) from the same code and content; Editor and tools running on Mac OS X (10.7 Lion or later), Windows 7 and later, Linux (Ubuntu LTS and Debian 7 has been verified to work)
Version Control
Git managed projects with easily accessible tools for synching changes through team; All data in easily merging text files
Optimization
Small engine overhead (currently about 5Mb but the goal is to cut that down considerably); Fast build times. All build targets, even HTML5, are completed in seconds; Static content dependencies gives automatic resource management. Only used assets are included in game builds; Sprite packing to atlases; Per platform configurable texture compression; Dynamic batching in the render pipeline; Asynchronous (or synchronous) loading of asset data
Graphics
Fully scriptable rendering pipeline with low level access; Custom materials and shaders; Particle effects editor with live previewing of emitter and modifier behavior; Curve editor for controlling particle parameter changes over particle lifespan; Tile editor for building 2D level geometry; GUI editor; Layered GUI with text, images and pie nodes; GUI clipping/stencil masks; GUI image nodes support slice-9 texturing; Automatic GUI layout and support for orientation changes; Bitmap and distance field fonts; Truetype, Opentype and BMFont supported
WorkFlow
Turn-key software with no dependencies on other programs. No need for Xcode for iOS deployment; Hot reloading of updated assets and logic; Wireless hot reloading, debugging and visual profiling on device; Scene editor for assembling and laying out assets and logic; Crash report API on all platforms; Automatic refactoring of assets; Prefab construction of game assets with collections and GUI with templates; Stand alone build pipeline for custom workflows; Headless engine for automated testing; Library sharing between projects
Audio
Ogg and Wav sound support; Hierarchy of mixers, fully scriptable
Physics
2D and 3D physics (Box 2D and Bullet) fully integrated; Precise collision detection; Static, dynamic and kinematic (scriptable) physics objects; Robust triggers
Debug and Test
Hot reload with custom Lua hooks for setup and inspection; Live on-screen visual profiler; Remote web-based profiler with visual frame sampling; Lua debugging via Zerobrane; Built-in video capture of game footage; Native crash log APIs
Scripting
Lua language fully integrated for expressing game logic safely and with good performance, Engine supports reactive-style Lua scripting for low overhead and great performance, Asynchronous communication between game objects
Extensions
Google and Apple push notification APIs, Google and Apple in-app purchases APIs, Facebook APIs, HTTP and Lua socket network APIs
II: INSTALLATION & LOGIN
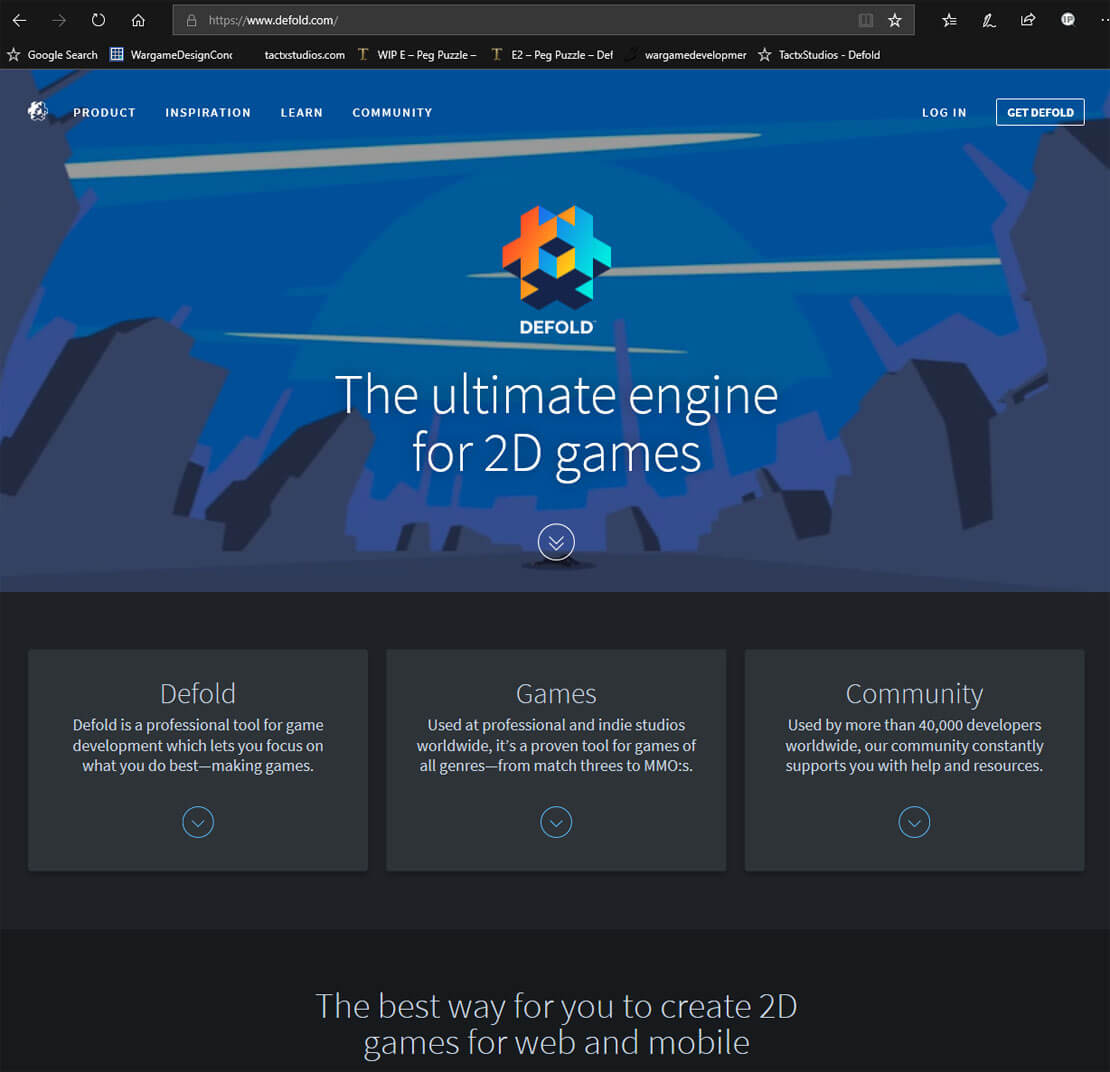
Once you are on the Defold website, follow the ‘Get Defold – Free Forever’ button on their homepage (www.defold.com), you can signup via the following log-in screen. Importantly, a Google Account is required to use the Defold Editor.

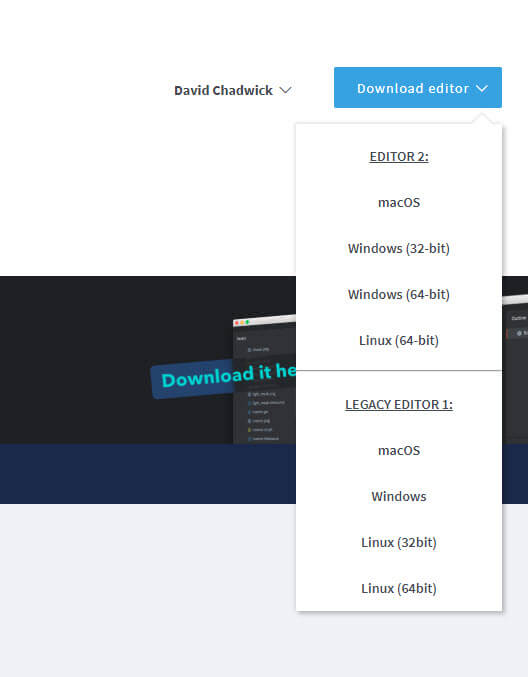
Defold offers users two options: (1) Editor 1 – a web based dashboard providing project development, and (2) Editor 2 – an application you can install on your desktop (Windows, Mac or Linux). Editor 1 stores your project on King Servers, while Editor 2 enables you to store your game project on your own desktop (or storage services, i.e, Dropbox, OneDrive, etc.
I like the idea of storing my projects on my own platform, so I have elected to use the Editor 2, selecting the Windows (64-bit) option.. Users can download the current Defold Editor 2 by selecting your target platform as illustrated below.
The download is a zipfile (Defold-x86_64-win32.zip) which contains the defold.exe executable and all the support files which can be extracted into a folder on your desktop/laptop.
III: DEFOLD EDITOR v2
Once copied into a folder, you can initiate the editor by executing Defold.exe. That will bring up the following dialog box which shows both recent projects as well as enabling the user to open other projects.
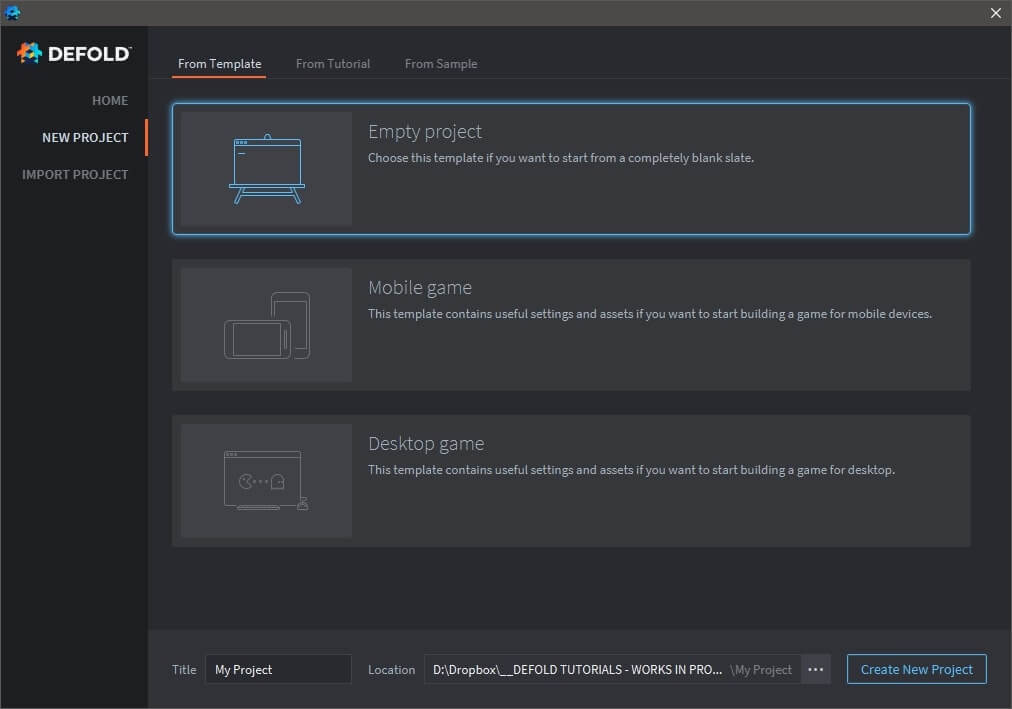
This enables you to either work a project that you created on the defold.com dashboard, or alternatively, you can open a project that is stored on your own desktop (or dropbox/onedrive, etc. account). When a project is opened, the workspace consists of six major panels as depicted below.
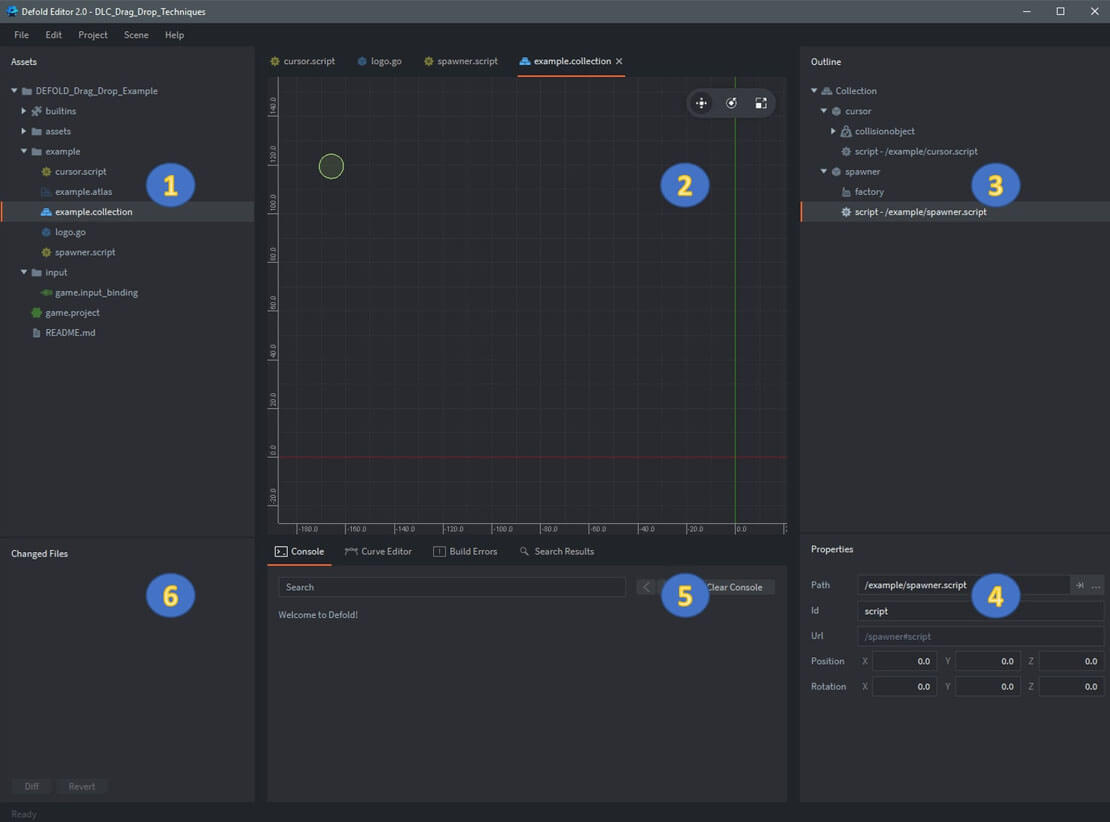
As highlighted on the Defold Getting Started tutorial on Defold’s website, the editor consists of the following main areas:
1 - Project Explorer
This is a view of all files in your project. Different file types have different icons. Double click on a file to open it in a designated editor for that file type. The special read-only folder “builtins” is common for all projects and includes useful items like a default render script, a font, materials for rendering various components and other things.
2 - Main Editor View
Depending on which filetype you’re editing, this view will show an editor for that type. Most commonly used is the Scene editor that you see here. Each open file is shown in a separate tab.
3 - Outline
The content of the currently edited file in a hierarchical view. You can add, delete, modify and select objects and components through this view.
4 - Properties
The properties set on the currently selected object or component.
5 - Console
When running the game, this view captures output (logging, errors, debug info etc) coming from the game engine, and also any custom print() and pprint() debug messages from your scripts. If your app or game won’t start -- the console is the first thing to check. Behind the console are a set of tabs displaying error information as well as a curve editor that is used when building particle effects.
6 - Changed Files
Contains a list of all the edits you have made in your branch since last synchronization. So if you see anything in this pane, you have changes that are not on the server yet. You can open a text-only diff and revert changes through this view.
IV: SIMPLE DEFOLD GAME TEMPLATE
Using the Defold ‘Getting Started’ tutorial as a basis, I’ve created a very simple template that I plan to use as a foundation for testing various Defold game engine features. Importantly, you can download this template onto your own PC/Mac and use the Defold Editor 2 environment to build applications. Some quick background -- there was a lot of internet commentary about the initial Defold release -- focused on the initial editor requiring developers to store their application files on King’s servers. As mentioned earlier — that is no longer the case, it was fully resolved with the release of Editor 2.

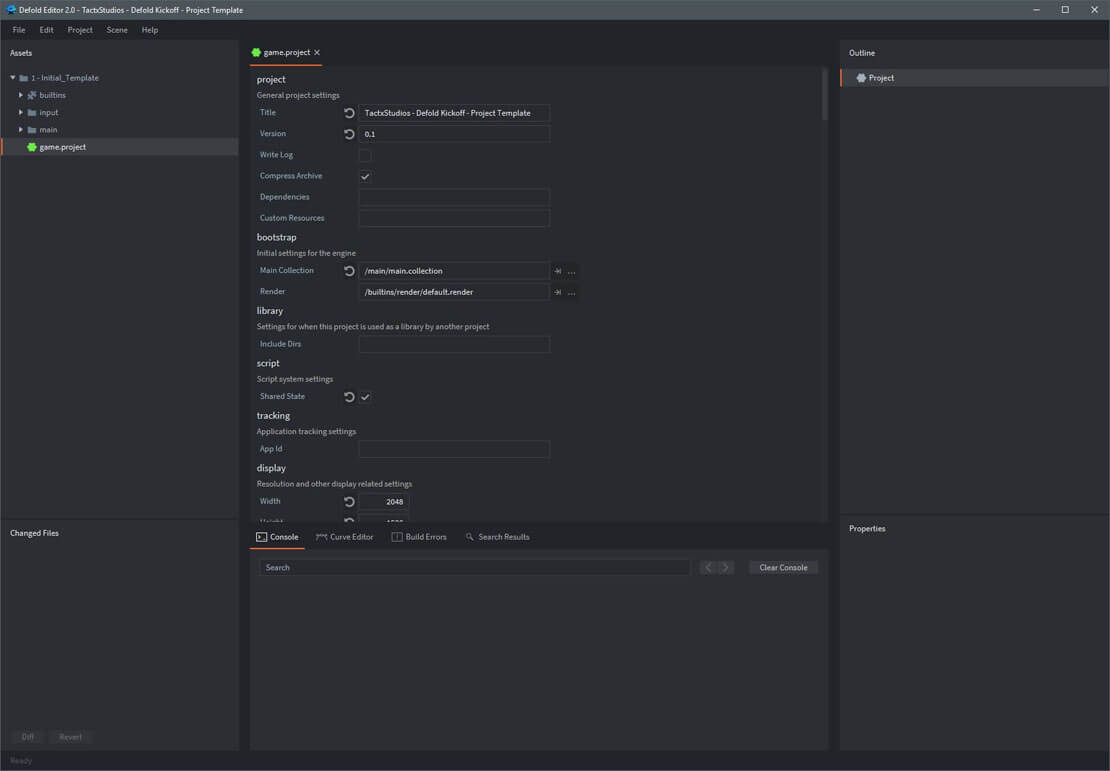
The game.project file contains all project settings for your application, to include parameters related to the overall project, physics, graphics, input mechanisms, sound and sprite characteristics, iOS and Android icon images, etc.
For the purposes of this initial introduction, I’ve kept all the default parameters provided by Defold — but have changed the project title and display resolution settings.
From this (humble) kickoff, my plan is to research, develop, test and writeup a series of blog entries, each of which present a commonly used game procedure – providing a downloadable project which contains the code snippets.
V: TUTORIAL WRAP-UP
Please let me know if you have a question on any aspect of this tutorial – just drop me a note in the comment box below. I'll get right back to you. Also – let me know if you find these tutorials helpful. I look forward to your feedback.
All the best - Dave